I have been going through some craft bins that I have not gone through in some time. I had totally forgotten about an accidental purchase from another blogger I had done. I thought I was purchasing one item and ended up with completely different item. It was my error so I kept the purchase and put it away. I had just had surgery and was probably medicated at the time of purchase. 😂 It's been a few years since they were put away, but I found them!!


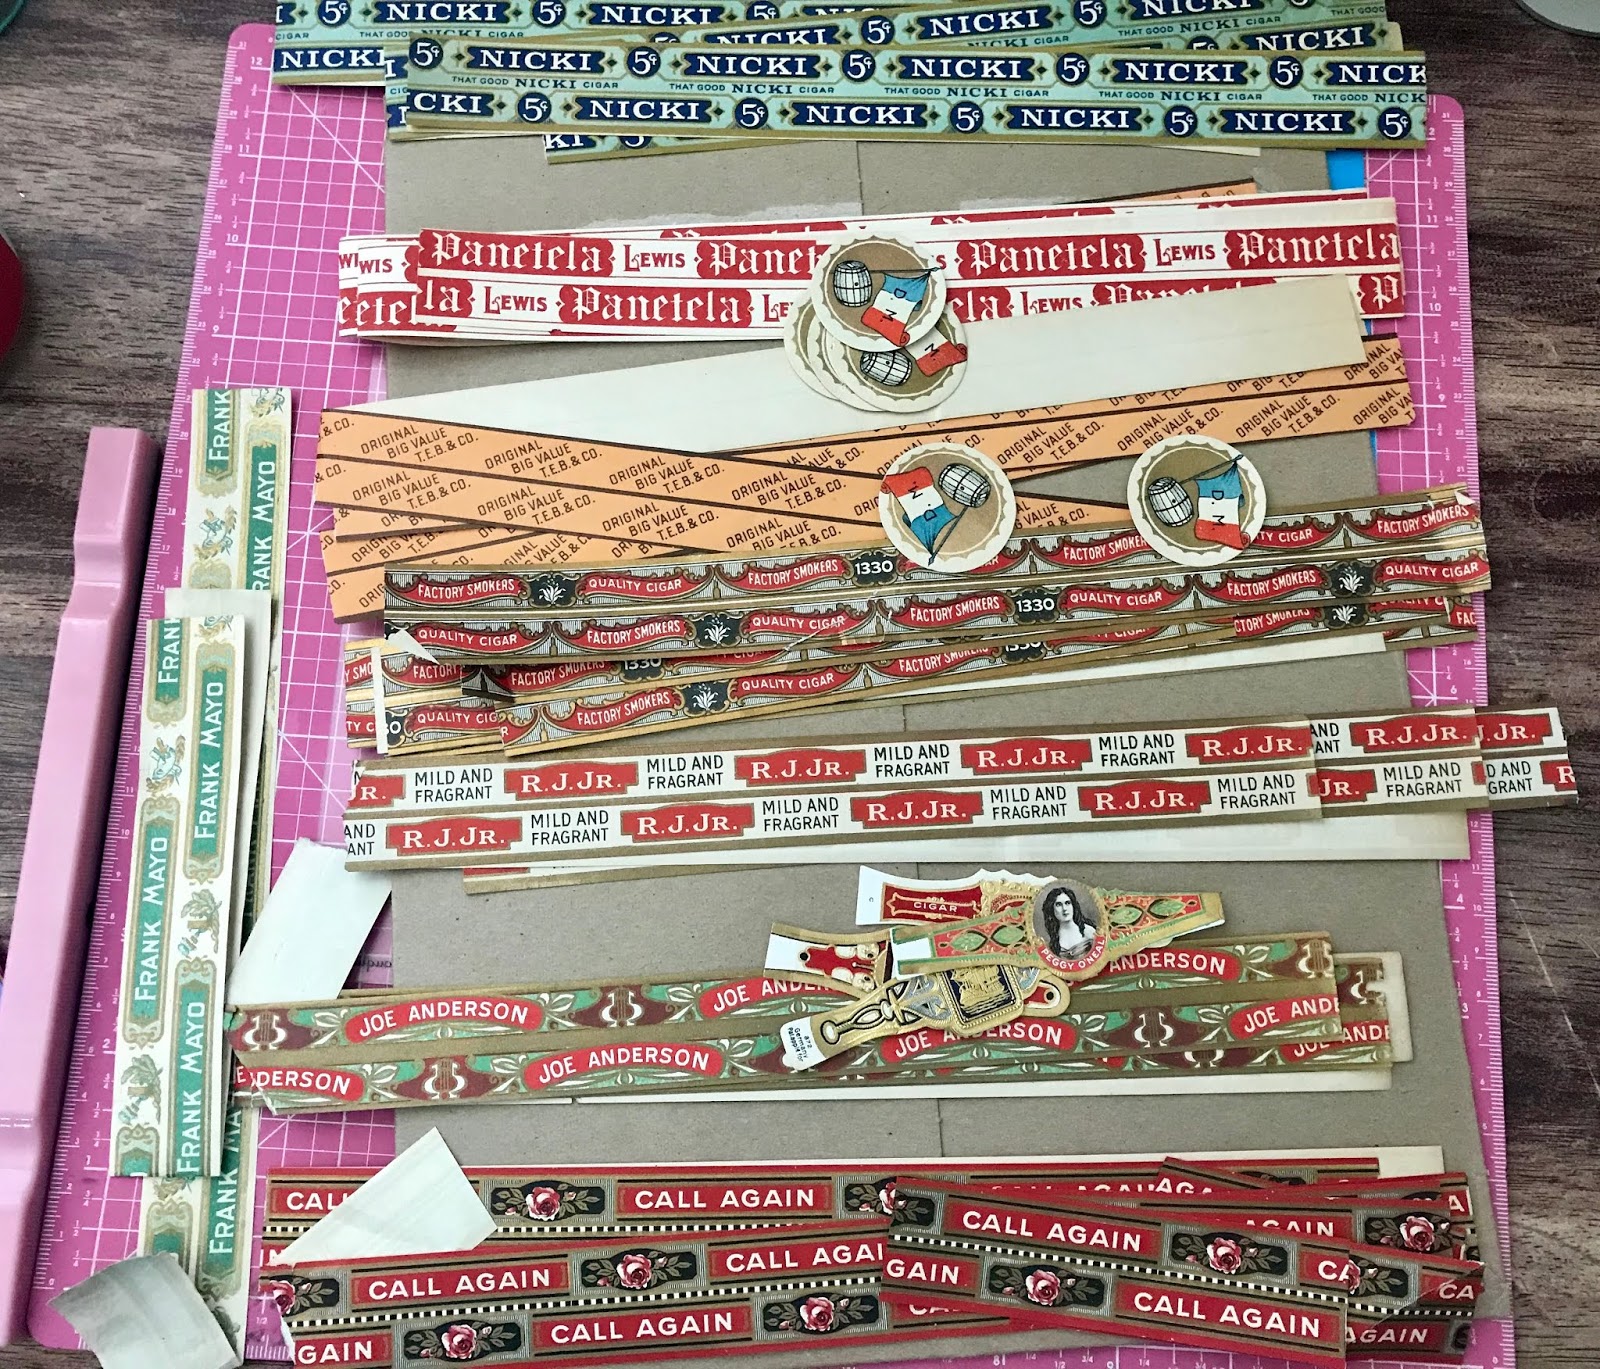
Yup, cigar box labels. 😆 Looking back, the crafter I purchased them from probably listed them because she didn't know what to do with them either. Or maybe she did and just changed her mind, regardless, they're mine now. This isn't all of them, but a good chuck of them.
I was contemplating selling them on eBay, because I really couldn't imagine doing anything with them. I had purchased some cork coasters for another project I had in mind, the the exact same day I found the cigar labels. All I could think was, it was meant to be. I decided to go ahead and make the cigar label coasters and I have to say that I love the outcome.
I purchased a pack of 6 cork coasters for real cheap at a local store here. I was so excited to do another project using them.

I bet if you look around your house you might find some items that could be recovered doing the same method; or upcycle an old coaster set or use old/extra tiles you may have lying around. I have a deep love for repurposing/recycling.

Before I start, I give the coaster a gentle rub to remove any dust or debris that may be on the coaster.

I get the cigar labels and place it on top of the coaster cutting slightly bigger than the actual coaster.

Each of my coasters took 3.5 rows. I made sure to have enough for four rows.

I also bend the ends down a little. I found that helps with a cleaner look, and the glue seemed to adhere better.

I used Matte Mod Podge first and then sealed it at the end. Later when I seal these, I will use Dishwasher Safe Mod Podge. First, I will use this one, Matte Mod Podge.
I did test one of the coasters using the Dishwasher Safe Mod Podge only, from beginning to end and it is a different look. I have added a picture and explanation at the end of this blog.

I placed Mod Podge on the coaster generously, making sure to get the corners well. Then I placed the cigar label down and try to get it up as far on the coaster as I can. Then I put some Mod Podge on top of the label, applying pressure with my paint brush and moving slowly down the coaster to get the next line ready for placement.

I just keep repeating the process until I'm done. I go back a forth several times with the brush to even out the glue and it helps put pressure to the paper and keep it down.

Once I let the glue dry. I trim the excess cigar labels.


I found when I do not apply a lot of pressure and gently go over the labels a couple of times with my knife, it not only slides off easily, but it is clean cut and look.

I needed to seal them so that they can hold up if they get wet, which I'd imagine they will since that's their job. lol I decided to use the Dishwasher Safe Mod Podge. I put no less than three coats.

After each coat of Mod Podge, I always wipe down the coaster, gently, so that if there is any dust, it will not be permanently part of the coaster(s). 😅

My final product:

I LOVE the way they came out and I plan to give a set to my husband.
These would make a great Father's Day Gift, a man cave decor addition or add a case of beer and these would be a great male gift for any occasion (Boss's Day, Birthday, Bachelor Party).


These would make a great Father's Day Gift, a man cave decor addition or add a case of beer and these would be a great male gift for any occasion (Boss's Day, Birthday, Bachelor Party).


SIDE NOTE #1: I wanted to see what would happen if I used the Dishwasher Safe Mod Podge for all the steps instead of first using the Matte Mod Podge and then finishing with the Dishwasher Safe Mod Podge. It smeared and removed some of the print from the cigar label. I ended up loving the look. It looks a little antique-y, but I'm glad I tested this out before I happen to ruin something that would have made me a little sad.

SIDE NOTE #2: I kept all the cigar labels pieces that were not big enough to place on a coaster, but not small enough to throw away. I could use them for crafting: adding to a tag, junk journaling, or making a coaster with all the left over pieces. Maybe there will be a happily ever ending blog about it.
I didn't know what in the world I was ever going to do with these cigar labels, but I ended up being very happy with how my projects turned out.
I didn't know what in the world I was ever going to do with these cigar labels, but I ended up being very happy with how my projects turned out.

Until next time ... Happy Crafting!
Comments