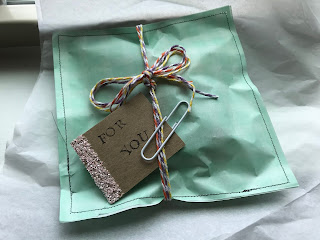
My friends kids spend the night this weekend and I thought I would send her kids back with a small gift for her. Why? Our kids have been friends since before they could walk/talk and have the sweetest friendship, and I'm just grateful for the friendship our families have maintained through the years. I personally feel that small gifts give me so much joy and are more heart felt - I hope she does too. I decided to sew her package and here's what I got. I hope you enjoy.
I picked some fun wax baking paper and made sure I had picked a piece that was big enough to put the gift inside the package and enough room to sew it up. I've made some with regular white wax and parchment paper. They sell it by the roll and are very affordable.
I have the red tape in place, so that I don't slide all over the place and my line is decent. I usually just leave the red tap there, but totally not necessary.
I then moved my needle over to the right to my desired spot and begin sewing. I do a back a forth stitch to start. When I need to stop and leave an opening to insert gift, I do another back and forth stitch.
(Another pic of opening to insert gift is down a little lower, I forgot to take a pic in sequence for this step in the diy. 🙈)
If you noticed above ↑ that I didn't start the stitch on the edge. I started about an inch and a half to two inches in. I feel it keeps the paper more sturdy when trying to place item inside without tearing it. At this point I placed my item in the sack and started to sew it up.
I personally love the thread tail that I had. Remember I have two, but because I love them, I kept them. I just trimmed them down a bit.
I loved the way it was turning out, but felt it could use some embellishments to make it a little more special. I went to see what I had in my stash and doesn't it all look yummy? I ended up using some of the colorful bakers twine. I say, use what you have. Some cute ribbon would have been sweet too.
Once you know what you want to do with it, just cut it down to size and attach.
I did a bow, but almost went with a knot, because I love that look too. 😀
I added a tag and attached it with a big white paper clip.
So cute, don't you think?
I had the best time creating this for my sweet friend. I hope she has fun tearing it open and finding some fun goodies for her to enjoy.
I have sent her three customized clothespins, one has a strong magnetic backing. I love these so much and like to use them for everything. Even the cardstock used to hold and display the clothespins are reusable.
Great uses for clothespins: attaching to gift with a note/card, chip clips, photo/note holder. Some have magnets so great for taking to work and attaching a fun memory, kids art, photo.
Great uses for the chipboard: scrapbooking, junk journaling, adding to a gift as a gift tag, write a message and attache it with a clip.
I will do a DIY on clothespins down the road, but I hope you enjoyed this and try sewing up some of your gifts. Such a great fun way to receive and open a gift. I will be listing some already made in my Etsy store this week.
Happy Crafting!


Comments